Easily Resize Multiple Images Quickly Through the Terminal on Your Mac
Several months ago I went to compress the images I planned on uploading for my new blog post and realized that I could no longer follow the same steps I had used before. I normally make my images smaller using the Preview application on my Mac so they’d take up less room on my server but a step in my process had broken and I wasn’t sure how to go about doing that anymore. My husband Matt recommended I look into ImageMagick® and after looking around online I was able to figure out how to resize multiple images at once using my terminal. Just in case you’re also looking at resizing and/or compressing your images I figured I’d share what I did with you. I’ve only gone through this process on my Mac so the images below will reflect that; that said, I see the current release, at this time, of the free ImageMagick® software (version 7.0.10-57) “runs on Linux, Windows, Mac Os X, iOS, Android OS, and others” so a variant of this should work for you regardless of what device you’re on.
Overview
Back when the quality slider in the Preview application stopped working for me when exporting images on my Mac I realized I wasn’t quite sure how to compress the images I needed to upload to my website’s server. I mentioned the bug to Matt while lamenting over what I should do and he recommended I look into ImageMagick®. After installing it, using Homebrew through the terminal, I was able to figure out how to resize a single image and then worked on compressing all the images in my directory (or folder). Two of the blog posts I found helpful while learning included an article called A few basic (but powerful) ImageMagick commands by Sunny Srinidhi in 2017 on Medium and Smashing Magazine’s article called Efficient Image Resizing With ImageMagick by Dave Newton.
In case you’re also interested I figured I’d go through how I resized and compressed my images individually using the Preview application on my Mac computer before then going over how I now use ImageMagick® through my terminal to resize and compress all of the images in my directory at once.
Resizing and Compressing Images
Using Preview on My Mac…. a.k.a. Now the Old Way
My previous process when going through the photos I potentially wanted to use on my blog relied heavily on the Preview application. Each time I started out by moving all of the photos I potentially wanted to use into a directory, also known as a folder, so they’d all be in one place outside of the Photos application. I then highlighted all of them, right-clicked, and opened them in Preview. This way it was easier to see the larger photos and I could better compare, delete, and crop any images I wanted to.
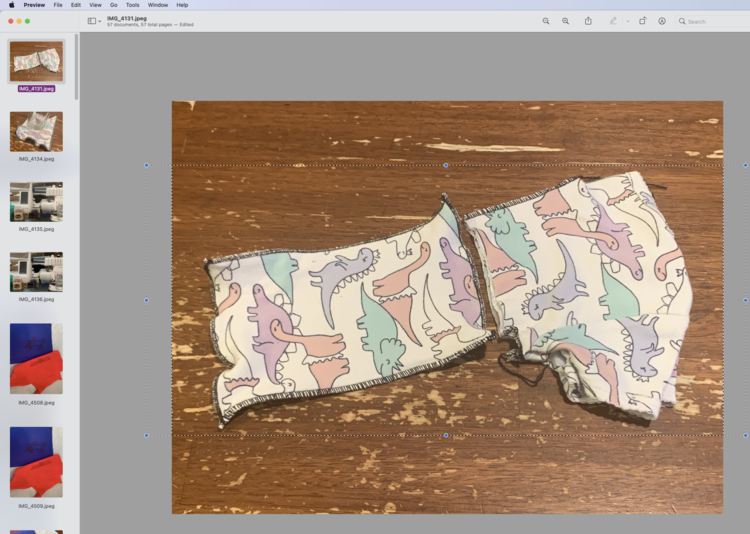
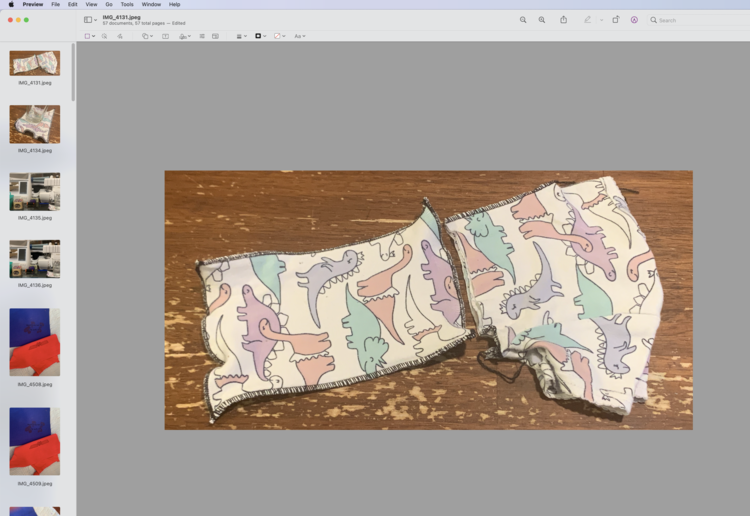
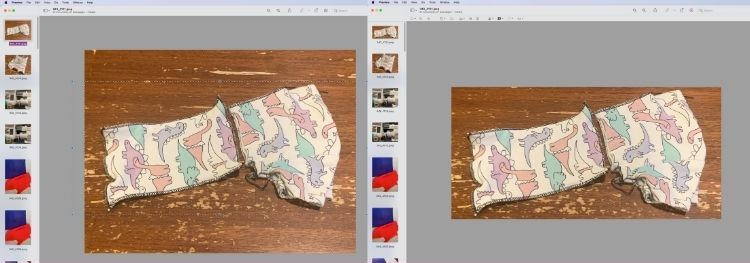
Once I’m happy with how the remaining images look I go onto the next step and resize them all. A year or more ago I used to resize the portrait and landscape images separately by resizing their longest edge to 750 pixels. Now I select all the images, regardless of it’s orientation, and, through Tools and Adjust Size, resize all of them at once to 750 pixels wide. Since I keep the width and height locked together the application does the calculations on each image to keep the aspect ratio the same. This does make any portrait images taller than the landscape ones but I now prefer having all the images in one post be the same width as you scroll through.
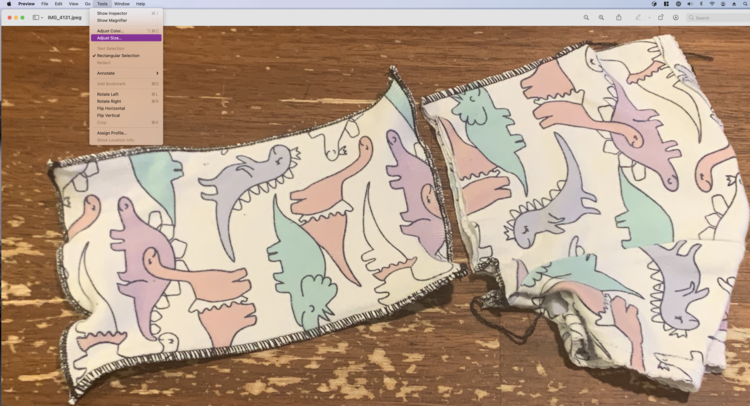
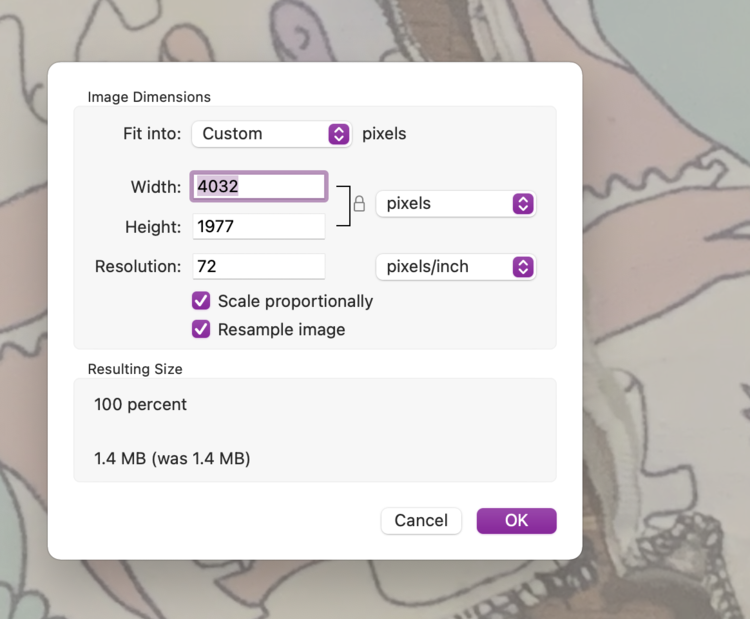
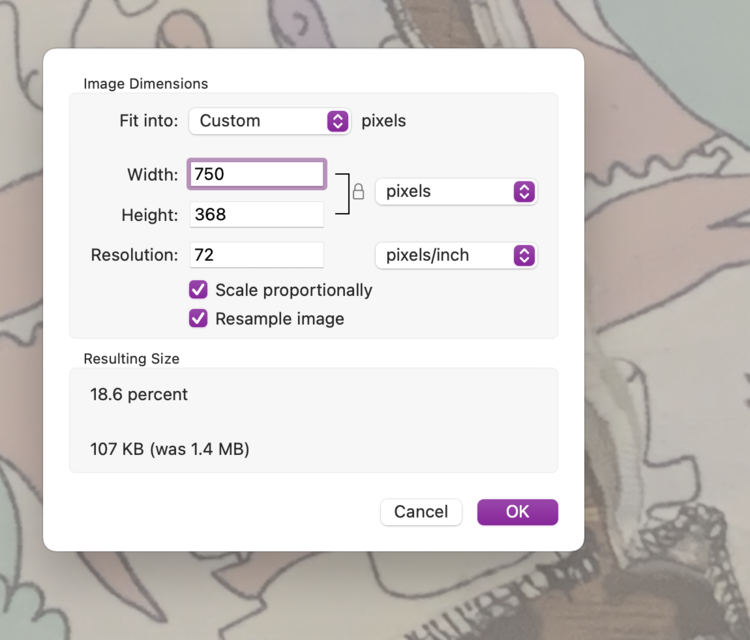
Once the resizing has happened it’s time to export each image individually and set it’s compression level. To do this I select the top image, go to File, and chose Export near the bottom. The dialog pops up and I go through my options. I first make sure the Where option is set to my directory for temporarily saved images called Landing Area. I then set the format of the image to JPEG and adjust the quality until the file size is just under 70 KB (kilobytes). I then click Save, the dialog closes, I select the next image, and then I go through this process again and again until I’ve exported and compressed all of the images I want to use in my post.
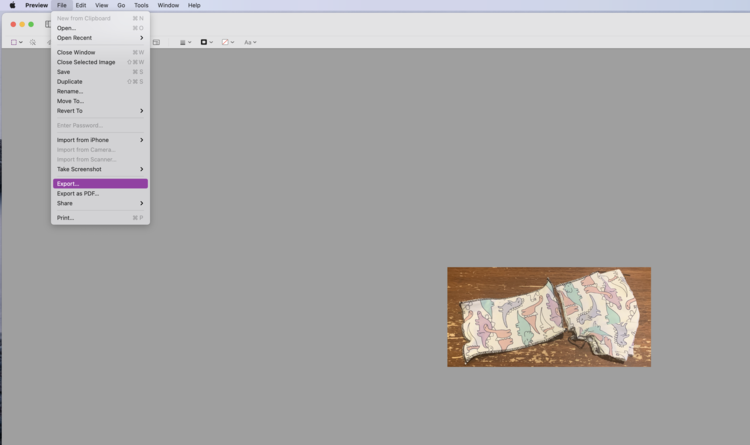
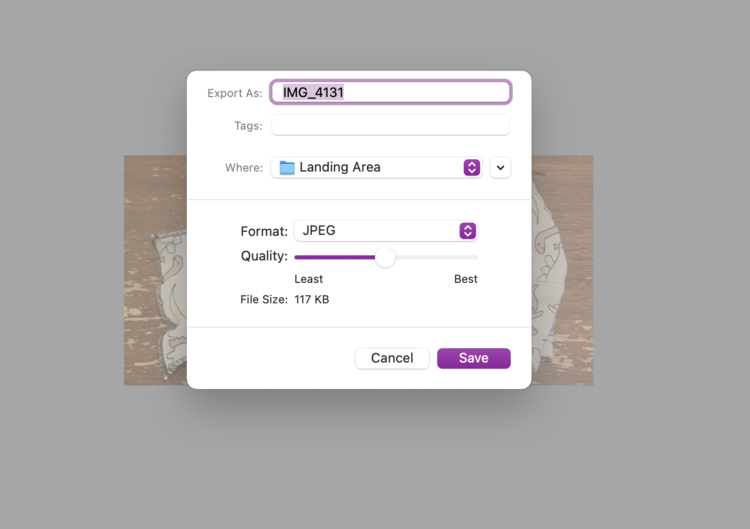
Landing Area directory and the format of the image is set to JPEG. I then adjust the Quality slider until the File Size is closely under 70 KB (kilobytes). I then hit Save, select the next image, and repeat these steps until all images are compressed and exported.I didn’t take any more photos of this process as the File Size has stopped updating when you move the Quality slider. This means if I kept using Preview for this step I would have to guess what the quality of the image should be, export it, check the new file’s size in the folder, and then keep adjusting and exporting until I was happy with the final image’s file size. This process is annoying with a single image and impossible with more. That said, in case this is fixed in the future, after I export all the images with the proper file sizes I’d next go to my Landing Area directory, select all of the saved images, right-click, choose to rename them, and then navigate the popup so I’d add the text compressed_ before each filename. After they’re renamed, to differentiate them from the full-sized original images, I’d next move them into my original directory and then upload each one to my matching blog post. This process was sometimes annoying and sometimes just a task I used to justify listening to fun music with. It never got bad enough that I took the time to find another way…. until this bug in the Preview’s popup showed up which ended up becoming fortunate for me in the end as it lead to this next way which I much prefer and had to share with you.
All at Once Through ImageMagick®… a.k.a. My New Quicker Way
Overview
I want to start by saying I still use the Preview application on my Mac to go through my images before using ImageMagick®. Again I start by putting all of the images I potentially want to use for my post into a named directory, or folder, I created specifically for that blog post. I next select all of these images, right-click, open Preview, and go through them while deleting the duplicates and cropping any photo that needs it. This is as far as I go within Preview now. After I close Preview, forcing it to save all the changes, I next use my new method to resize and compress all of the images at once.
Below I’ll start by going over the process I took to resize my images in case you’re interested in any of the intermediate steps I took on the way over. I’ll follow that up with my final command before touching on how I overcame running this against multiple file types. Next I’ll go over a more descriptive step by step process on how I opened the terminal and ran the command. Finally I’ll share a feature I stumbled across that allows me to create a collage programmatically through the command line.
Quick aside: I’m not using the default version of my terminal on my Mac. I’ve since installed fish and have played around with it’s appearance a bit. Figured I’d mention in case my terminal looks different from yours.
My Process
I learned how to do this in iterations starting with the simplest command to create a resized copy of my image set to 750 pixels wide which kept the height relative so the aspect ratio of the image stayed the same. In this case the original image is called inputImage.jpeg and the new resized image is outputImage.jpeg. The command is:
magick convert inputImage.jpeg -resize 750 outputImage.jpegThe resizing issue was so simple but I still needed to figure out the compression answer I next sought so I had iterate on my command. While looking I came across a way to resize all the images at once using the command mogrify. For instance if I wanted to resize all the JPEG images in a directory to 750 pixels wide, like I did with the inputImage.jpeg above, I would then use this command instead:
magick mogrify -path output -resize 750 *.jpegThis assumes your current directory contains another directory called output, specified next to the path argument, and then takes all the JPEG files in the current directory, resizes them so the width is 750 pixels, keeps the aspect ratio fixed so the height stays relative, and then saves the newly created version of each image to the output directory. You’re left with all the original JPEGs in your current directory and all of the newly compressed images in the output directory with names matching the original images thus why there’s an output directory used.
At this point I knew I loved the mogrify option as it could resize all the images I wanted to use in my blog posts and then saves the new images in an output directory so they wouldn’t get confused with the original images. Plus it didn’t matter that the names stayed the same as I could simply highlight them all and add the words compressed_ to the beginning of each image name before moving them up a directory; which was the same as what I did before using the Landing Area directory. I still needed to figure out how to compress the images though so I continued looking around and, based on a stack overflow question Recommendation for compressing JPG files with ImageMagick, I came across new parameters to use including strip, interlace, gaussian-blur, and, the one I focused on the most, quality. I next added the quality parameter to my command and played around with running it using different quality percentages each time. Even though all images could be resized to the same width and compressed with the same quality percentage at once they still resulted in differently sized image files. Some images were perfect right away while others needed smaller quality percentages set and became blurry before they ever reached 70 KB (kilobytes) in size. I realized the quality parameter, along with the other parameters I found, didn’t solve what I wanted and so I continued to search for other solutions. At this time an example command I was working with that included mogrify, an output directory, resizing to 750 pixels wide, and a quality of 85% was:
magick mogrify -path output -strip -interlace Plane -gaussian-blur 0.05 -resize 750 -quality 85% *.jpegJust as an aside if you’re looking for all the ways you can optimize your command to be specifically what you want it to be you may want to check out the amazing Annotated List of Command-line Options that ImageMagick previously posted. The list is amazing although it doesn’t contain the one thing that solved my compression issue.
My Final Command
I continued on kind of fumbling around while searching for different options that you’re probably not interested in before I finally came across my solution. I could still use my mogrify command but I also needed to use define to set the jpeg:extent parameter for the maximum size in kilobytes of all of the resulting image files. This solution was funnily enough found by returning to a webpage, the previously mentioned Stack Overflow question, and looking more closely at the comments under the official answer. This resulted in my working command now being:
magick mogrify -path output -resize 750 -define jpeg:extent=70KB *.jpegThis essentially does what I was doing before by playing with the quality percentage. Specifically:
[i]t works by generating many versions of the JPEG image, doing a binary search, of the output quality “-quality” setting, until it gets as close as possible to the file size given without exceeding it. It does this by writing the image repeatably into a temporary file and once it has the appropriate quality size, it then outputs the final image to the given output filename, once. ImageMagick Legacy
To better explain the final command I figured I’d write it down so I could easily separate each section and explain it for you.
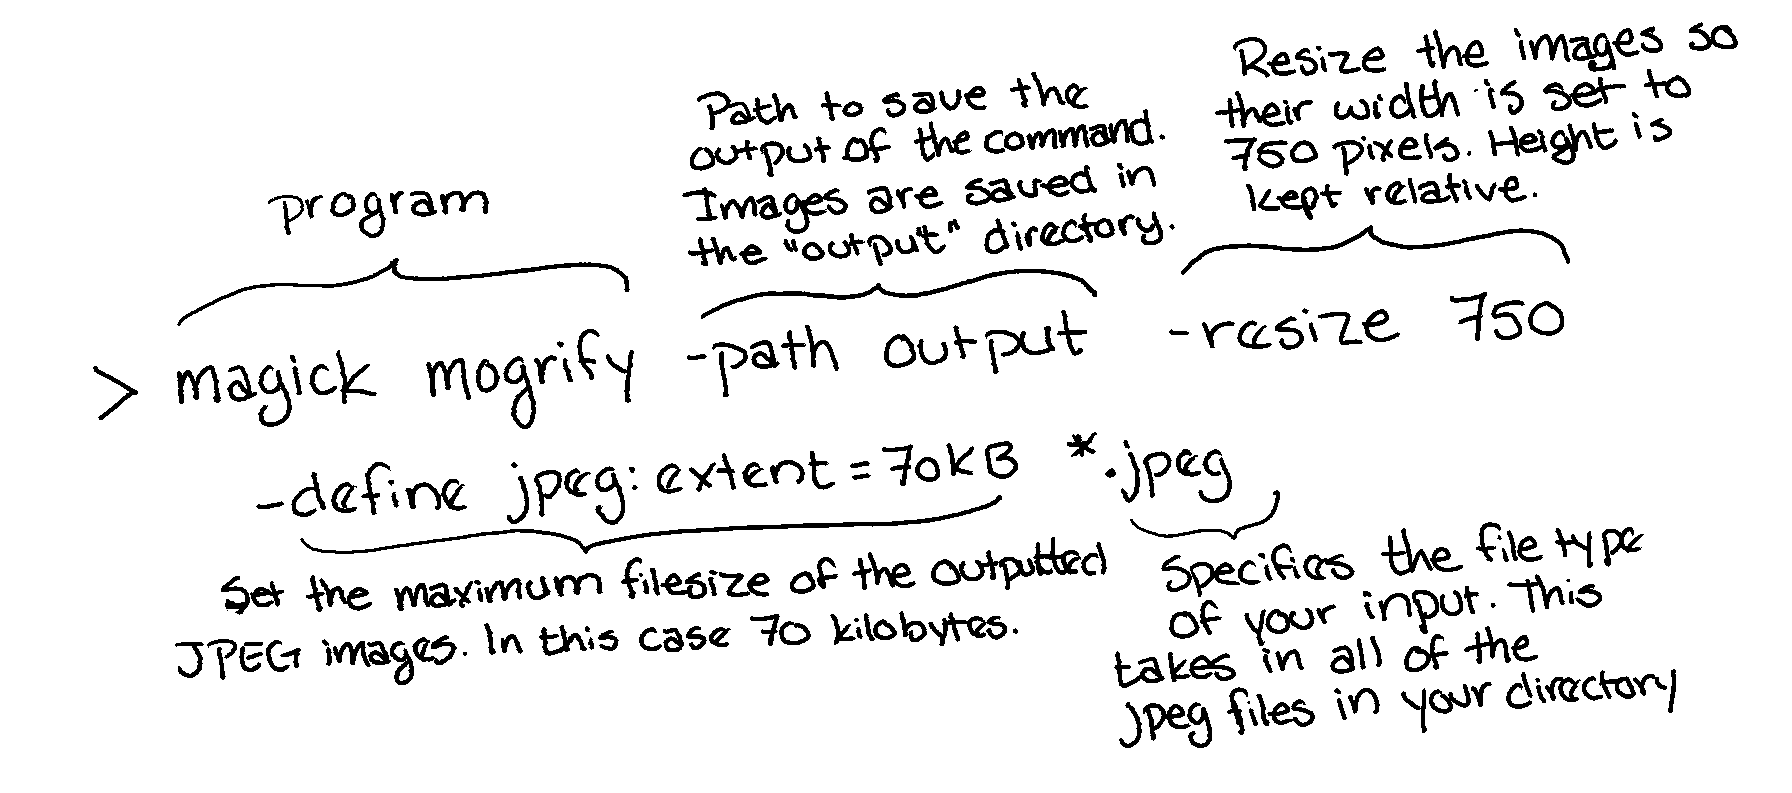
output directory. You can change which image files are resized and compressed with that last parameter.If you want to run this command on a different image file type like, for instance, PNGs you only need to change the last part of the command from *.jpeg to *.png. This part of the command specifies which file type it’s taking as an input from your current directory. Do not change the jpeg:extent part. I did that before and it resulting in my images’ max file size not being capped… and it took me much longer than I care to admit to realize why it wasn’t working. Basically that option only works on JPEGs so your image is temporarily converted into a JPEG so this part of the command can be run. If you want to learn more I found the information about this on ImageMagick v6 examples through ImageMagick (Legacy). Anyway, for the last command the asterisk (*) matches to anything so you’re basically saying any filename ending, since there’s no asterisk at the end, with .png should be the input. If you change the ending to…. hmmm… let’s say *kyra* then it matches to any file in your directory containing the word kyra and since the asterisk is both at the beginning and end the word can be anywhere in your filename.
Multiple Image File Types
As I sometimes have a mix of different image files in my directory I started running my command several times making sure to change the argument at the end so each image file type was matched once. This made me realize that the matching was also case sensitive as *.png and *.PNG match differently. After deciding all the possible image types I might want to run my command against I decided to combine them all into one single command, each separated by a semicolon, since I wanted each individual command to run regardless of whether the previous command ran successfully or not. If you want the current command to run depending on whether the previous command ran or failed you can use the logical AND (&&) or OR (||) operator instead of the semicolon depending on which you want.
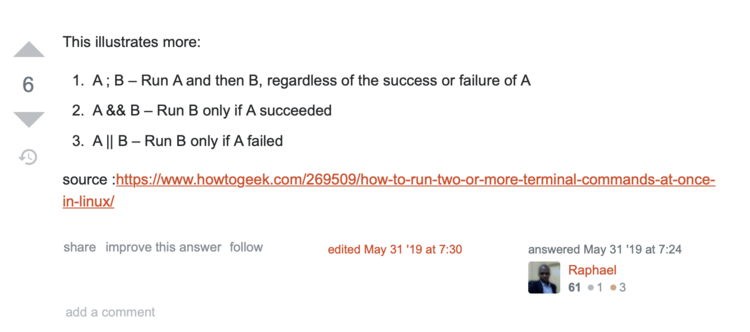
Anyway this mega-command ended up becoming this:
> mogrify -path output -resize 750 -quality 100% -define jpeg:extent=70KB *.JPG ; mogrify -path output -resize 750 -quality 100% -define jpeg:extent=70KB *.jpg ; mogrify -path output -resize 750 -quality 100% -define jpeg:extent=70KB *.PNG ; mogrify -path output -resize 750 -quality 100% -define jpeg:extent=70KB *.png ; mogrify -path output -resize 750 -quality 100% -define jpeg:extent=70KB *.jpeg ; mogrify -path output -resize 750 -quality 100% -define jpeg:extent=70KB *.JPEG
While going over the last paragraph in the previous section I suddenly had an epiphany when I realized I didn’t have to limit the last parameter to only file types. It matches to filenames in whichever case sensitive way you want it to match. This means you can replace the multi-command line above if you can find something similar between all the image filenames you want to resize and/or compress. For instance all of my images are, by default, named starting with IMG_. This means instead of the mega-command above I could get the same results using this command instead:
mogrify -path output -resize 750 -quality 100% -define jpeg:extent=70KB IMG_*Detailed Steps on How I Ran the Command
I figured I’d go over the steps on how I ran this command in case you need a bit more help. Like I mentioned before I started out by putting all the images I was interested in uploading to my blog post into it’s own directory. I used Preview to first delete the duplicate images and crop any needed images before I was ready to resize and compress the remaining ones. You can open a terminal many ways, but in this case I had the directory open already so I chose to right-click on one of the images, scrolled to the bottom, and chose to open the iTerm window or tab here. The terminal then pops open with it’s pathway already set to my current directory so I don’t have to navigate within the terminal at all.
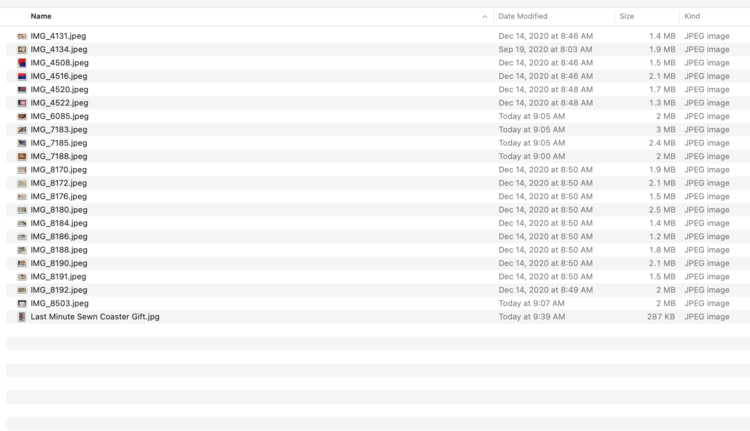
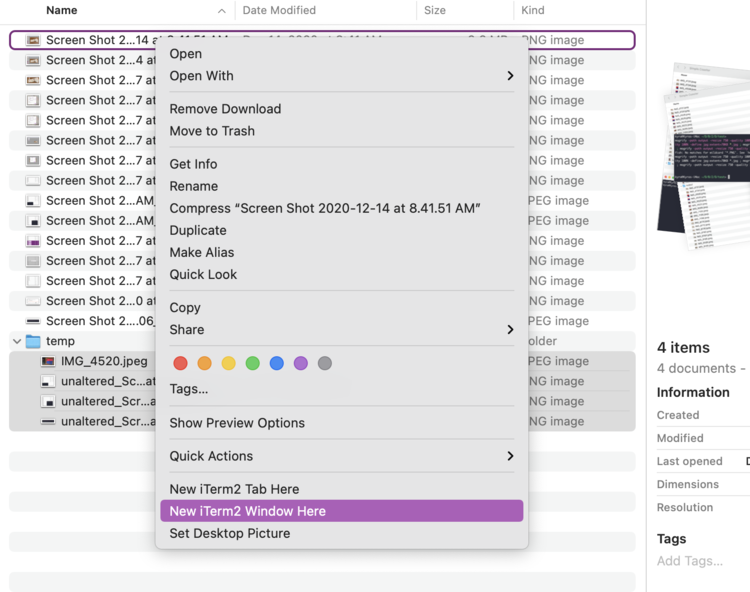
mogrify command on the main directory.Once the terminal is opened there is one more thing I need to do before I can run the command. The command mogrify needs an output directory, or you can name it something else if you edit the command, to save the images inside. I could’ve created the new directory through the Mac’s filesystem but it’s simpler to do through the terminal. To create a directory all you need to do is call mkdir, for make a directory, followed by it’s name. So in this case I wrote mkdir output and then pressed enter. Now you can ran the command and it’ll resize and compress your matching images and save the new versions inside this new output directory.
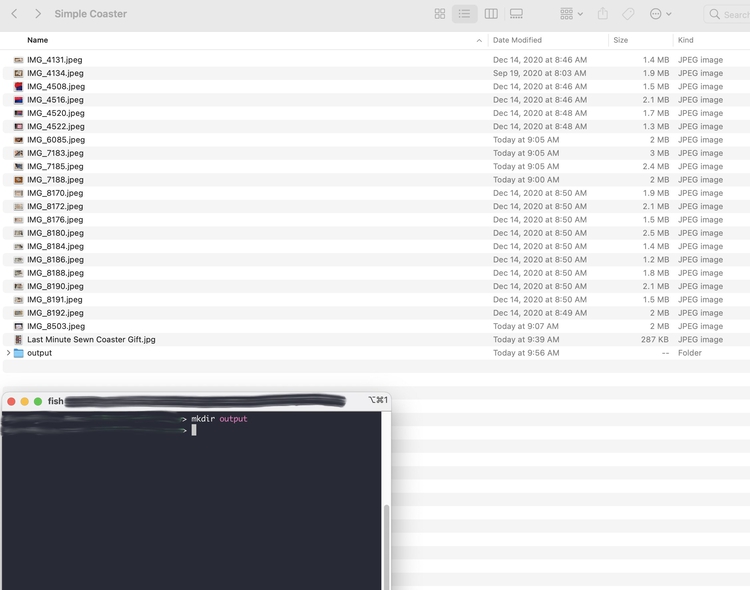
mogrify command would be able to save the new images inside of it. To create the directory I used the command mkdir which stands for make directory. Overall I wrote: mkdir output.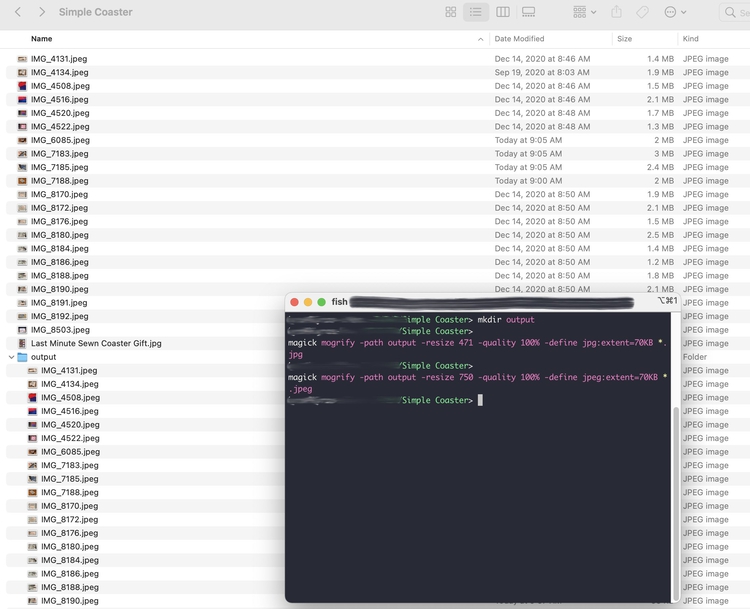
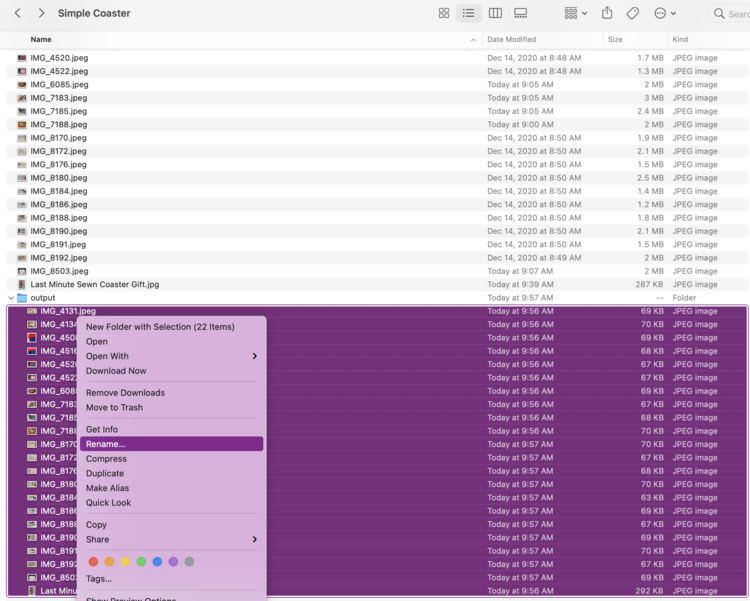
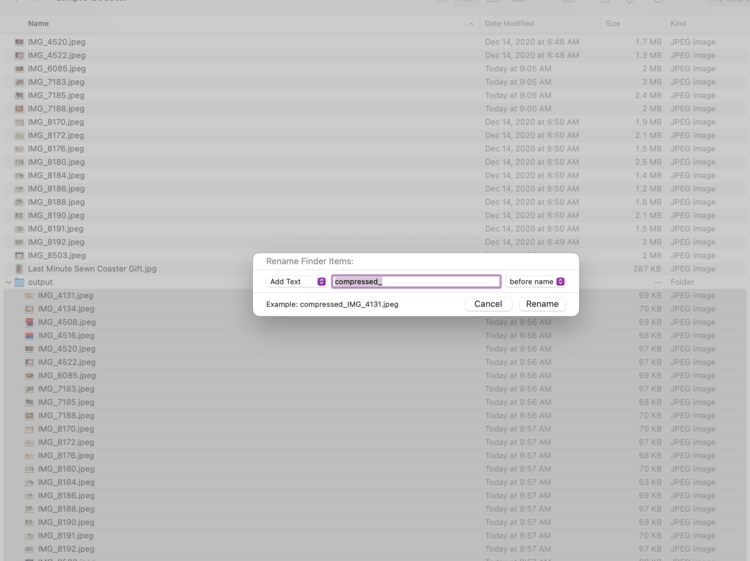
mogrify command. Here I ran it once against the JPGs and then again against the JPEGs. All the resized and compressed images were created within the output directory.Once the images were resized, compressed, and saved to the output directory it was time to rename them all. To do this I closed the terminal, selected all of the new images, right-clicked on them, and then scrolled down to select Rename. Once the popup opened I selected the drop-down and switched it from the selected Replace Text so it instead said Add Text. I then typed compressed_ into the text box and hit the Rename button so all the selected images start with that text.
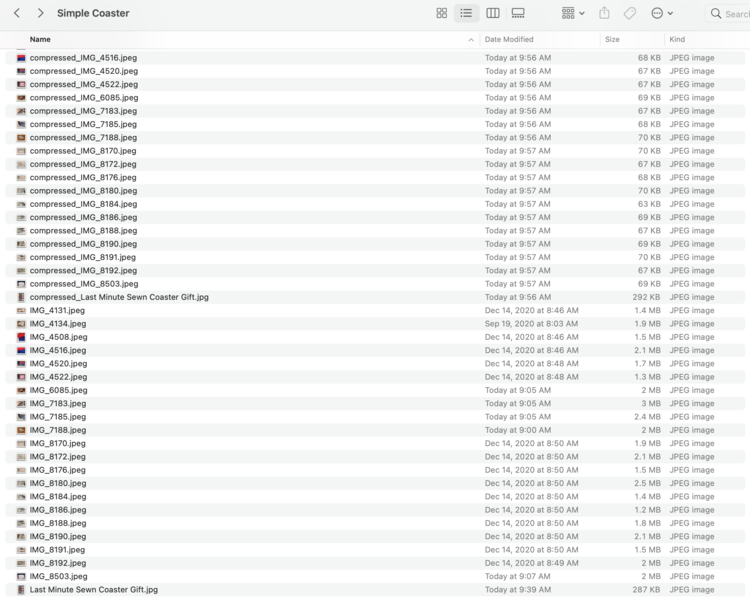
Once they were renamed I then dragged all of these selected images out of the output directory so they’re mixed in with the rest and deleted the now empty directory. And with that most of the images I wanted to use for my Sew a Coaster blog post were all resized, compressed, and ready to be uploaded to my website. This was so much quicker than my earlier method.
Quick Aside: Do You Want to Create a Collage?
During this process I came across a way to generate a collage through the command line and I figured I’d also share it. To do this you call montage and pass in the names of the images you want to include in the collage ending with how you want to name the final collage. Thus if you have four images you would call it like this:
montage image1.jpg image2.jpg image3.jpg image4.jpg output_montage.jpgThis is as much as I’ve done with montage but there’s way more information about it listed on the ImageMagick website if you want to delve into it more.
Looking back I’m so glad, for me, that the file size stopped updating on the Preview export window, as it forced me to find a better way. That said I hope this post was helpful to you in some way. If it was feel free to let me know which parts you ended up using? Or what made you go looking for this topic? Regardless of what you want to share you can use the comments below. I hope your week is going as splendidly as it can in this time.
If you’re interested in getting any of my future blog updates I currently come out with a new one every Wednesday and share them to my Facebook page and Instagram account. You’re also more than welcome to join my email list located right under the search bar or underneath this post.

